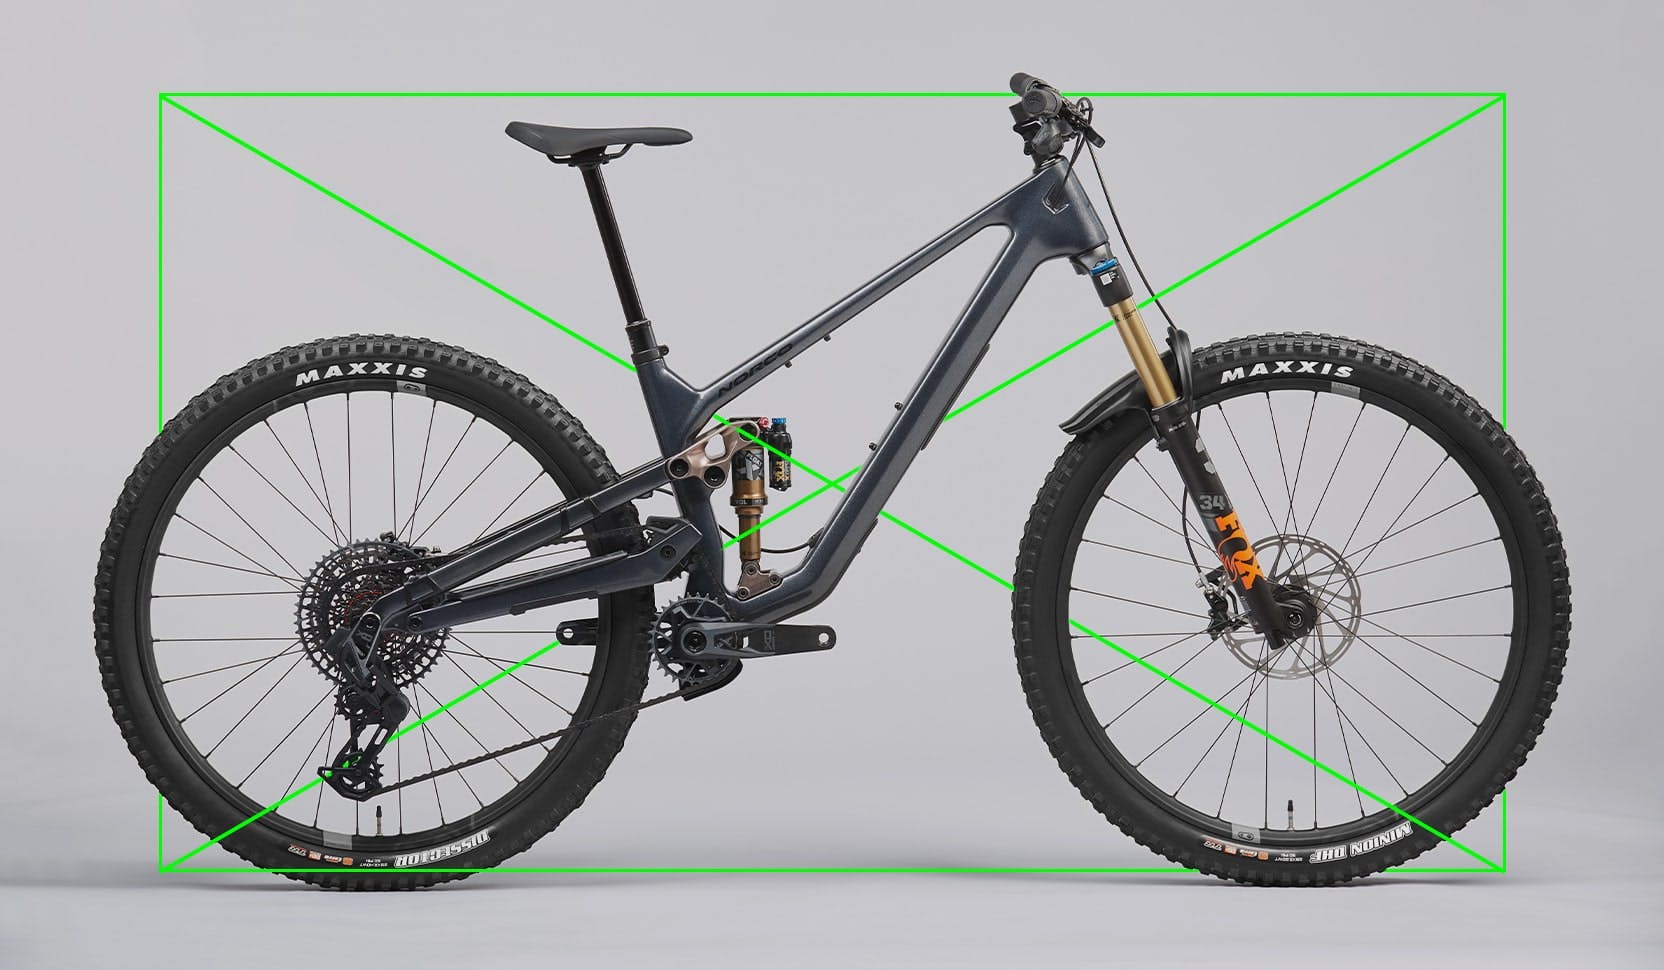
How To Setup Your Bike
Getting Started
Before you get started with the Ride Aligned setup guide be sure to know your weight including the gear you typically ride in. You'll also need the tools below handy to complete your setup:
- Bike multitool
- Tire pump
- Digital suspension pump
- Digital tire gauge
Note: Digital gauges are important as analog suspension and tire gauges don't have the precision needed for proper bike setup
- Go to Ride Aligned setup guide and select your bike model, component spec and wheelsize (if applicable). If you're having trouble finding your bike, use the search bar to filter by bike model, model year, or bike category.
- Enter your height and weight and select your frame size.
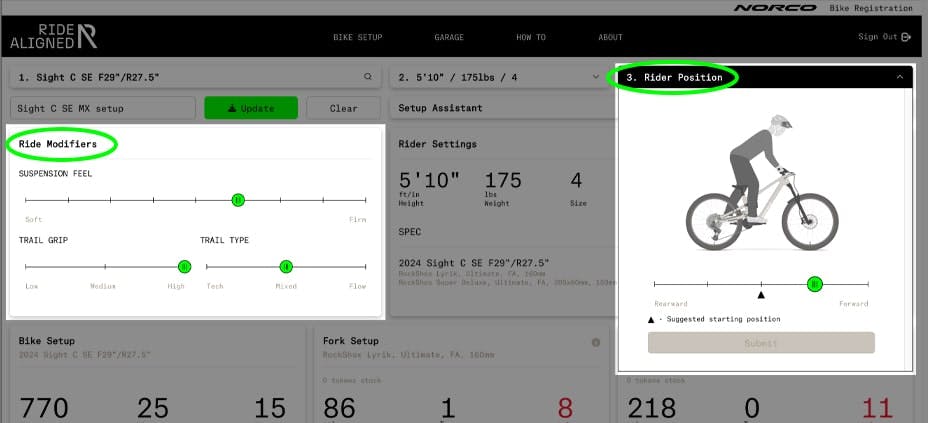
- Confirm your Rider Position setting. The Ride Aligned setup guide estimates your Rider Position setting based on your height, weight and frame size and this is a great starting point. You can return to this adjuster if needed or use the Setup Assistant to guide you through making a position adjustment. For more information on how the Rider Position slider works refer here.
- And just like that you have a bike setup custom tailored to you! Adjust your cockpit, tire pressure, fork and shock to these recommended settings.. You can also use the sliders in the Ride Modifier section to adjust your setup to suite your preferences and the trails you ride. For help setting up specific components on the bike refer to the sections below.
- Hit the trails! Get a few rides in and if you're looking for something more from your setup give the Setup Assistant a try. It will help you dial in your setup based on answers to some simple questions about your ride experience.
- Create a Ride Aligned login to save your setup to the Garage and easily refer back to your settings. Save multiple setups for your bike to the Garage to adjust your bike to where or what you're riding that day.
Supporting Info
Bike Setup
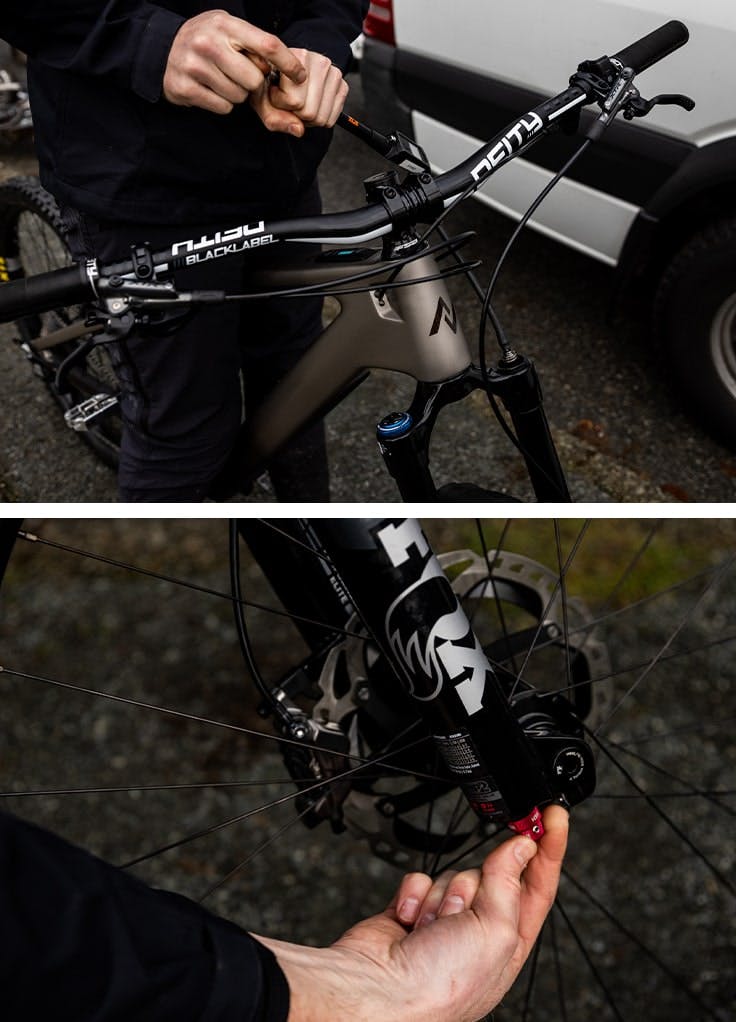
Bar Rise/Width
Your suspension settings account for bar height and bar width. Moving away from the recommended bar width will shift your weight on the bike and affect how your recommended settings feel on the trail.
The recommended handlebar rise will match the handlebar that comes installed on your bike. If you swap to a handlebar with different rise you should compensate by adding or removing stem spacers.
In many cases the handlebar that comes installed on your bike will be wider than the recommended handlebar width. It is important to note, the recommended handlebar width measurement in Ride Aligned is taken with both grips removed.
Narrowing your handlebar width requires removing the grips and cutting an equal amount off either side of the bar to achieve the recommended width. If you're not comfortable doing this yourself, contact your local Norco dealer for help.
Stem Spacers
The Stem Spacer recommendation in Ride Aligned refers to the height of spacers installed on the steer tube of the fork below the stem and above the headset. Adjusting the height of the spacers under your stem alters the height of the handlebar. Moving away from the recommended stem spacer setting will shift your weight on the bike and affect how your recommended bike settings feel on the trail.
Your bike will come installed with enough fork steerer tube length and stem spacers to adjust to your recommended setting. If you're unsure of how to properly adjust the spacers under your stem, contact your local Norco dealer for help.
Tire Pressure
To properly set your tire pressure, first inflate your tires using a pump until the gauge on your pump reads just above the Ride Aligned recommended pressures. Use a digital tire gauge to check both tire pressures and incrementally release air as needed until the reading on the tire gauge matches the recommended pressure for each tire. Tires pressure can change while your bike is sitting between rides so it is important to check your tire pressures before each ride.
Note: it is recommended that you set your tires up tubeless. If you are unsure how to set your tires up tubeless contact your Norco dealer.


Fork Setup
Adjusting fork volume spacers
Volume spacers are used to adjust the spring rate of the fork. The volume spacer setting recommended in Ride Aligned is based on the specific fork installed on your bike, your height, weight and frame size, and the intended purpose of your bike. Your Fork Setup information includes a note specifying the stock number of volume spacers installed in your fork at purchase. In some cases, your recommended Volume Spacer setting may differ from the stock volume spacers installed in your fork. If you're unsure of how to properly adjust the volume spacers in your fork, consult the fork manufacturer's user manual or contact your local Norco dealer for help.
Setting fork pressure
Inflating your fork will increase the pressure in the positive chamber. Most forks have a positive and negative air chamber that equalize when the fork is compressed to a specific point in its travel (typically 20-30%). It is important to make sure the pressure is equalized between the two chambers when air is added or removed from the fork before taking a pressure reading.
To inflate the fork, start by attaching the digital suspension pump to the air valve on the fork. Inflate the fork to the recommended pressure, in 30-40psi increments, equalizing at each increment. To equalize the positive and negative air chambers, cycle the fork through at least 30% of its travel 5 times. You may hear a hiss that indicates air is transferring between the two chambers.
When taking an air pressure reading, lift the front wheel off the ground by the handlebar to ensure the fork is fully extended. Wait for the pressure reading on the gauge to stabilize and compare the reading to the Ride Aligned recommended pressure. Add or remove pressure as needed and repeat the equalization and pressure checking process until the recommended pressure is reached.
Setting damper adjustments
Different fork models have different types of damper adjustments but in most cases there are 1-2 rebound adjustments and 1-2 compression adjustments. Check the information icon in your Ride Aligned Fork Setup for a diagram that shows where to find the adjusters on your specific fork.
Damper settings are typically counted in "clicks". "Clicks" are counted from the adjuster's fully clockwise (closed) position. When setting a damping adjuster start by turning the adjuster fully clockwise. Then turn the adjuster counter-clockwise counting the number of "clicks" until you reach the setting recommended in Ride Aligned. Repeat this process for all fork damper adjustments listed in your Ride Aligned Shock Setup.

Shock Setup (Air Shocks)
Adjusting shock volume spacers
Volume spacers are used to adjust the spring rate of the shock. The volume spacer setting recommended in Ride Aligned is based on the specific shock installed on your bike, your height, weight and frame size, and the intended purpose of your bike. Your Shock Setup information includes a note specifying the stock number of volume spacers installed in your shock at purchase. In most cases, the recommended number of volume spacers will match the stock volume spacer setup and no adjustment will be required. If the recommended Volume Spacer setting does differ from the stock volume spacers installed in your shock and you're unsure how to adjust this, consult the shock manufacturer's user manual or contact your local Norco dealer for help.
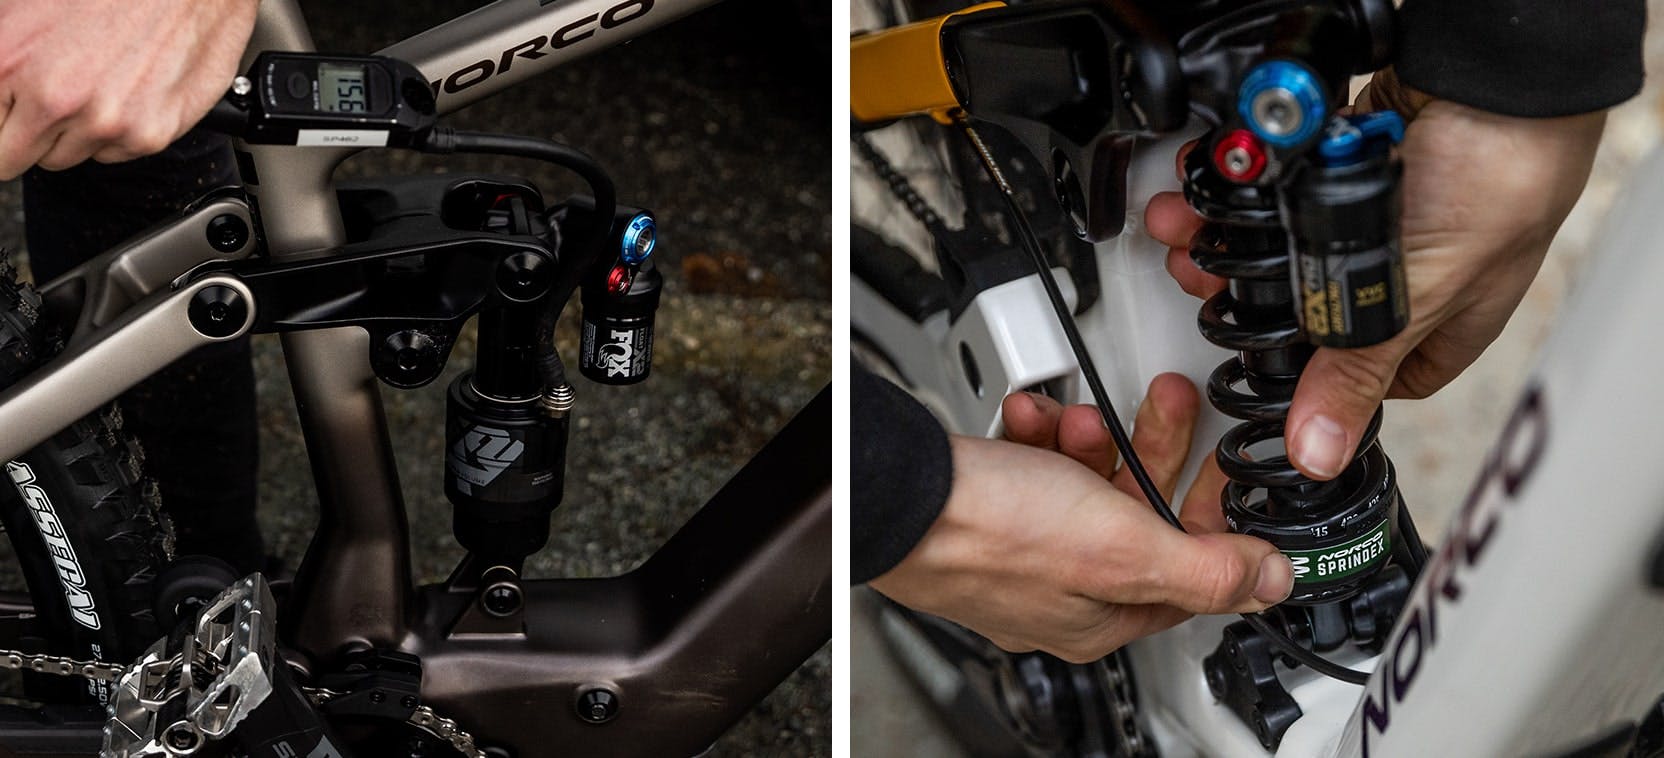
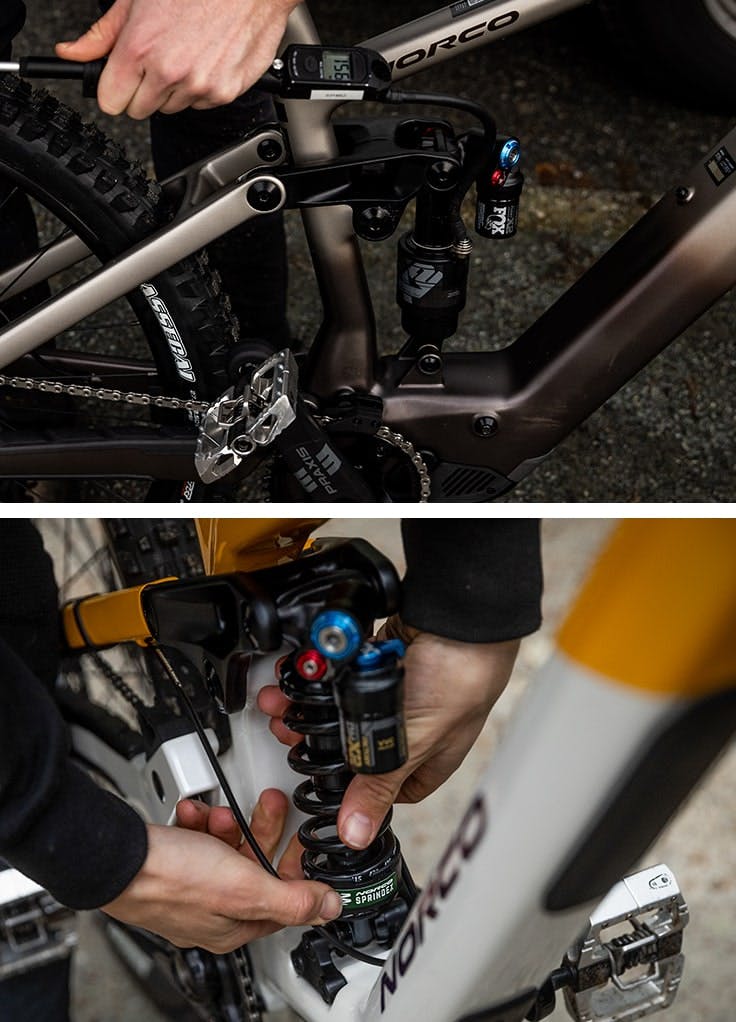
Setting shock pressure
Volume spacers are used to adjust the spring rate of the shock. The volume spacer setting recommended in Ride Aligned is based on the specific shock installed on your bike, your height, weight and frame size, and the intended purpose of your bike. Your Shock Setup information includes a note specifying the stock number of volume spacers installed in your shock at purchase. In most cases, the recommended number of volume spacers will match the stock volume spacer setup and no adjustment will be required. If the recommended Volume Spacer setting does differ from the stock volume spacers installed in your shock and you're unsure how to adjust this, consult the shock manufacturer's user manual or contact your local Norco dealer for help.
Shock Setup (Coil Shocks)
Adjusting coil spring rate
If your bike comes equipped with a coil shock it will have a spring of a specific rate installed as stock. Stock spring rates are estimated based on the average rider weight for a specific frame size. The spring on your bike should be labelled with its rate and the stock spring rate for your bike is also listed in the Shock Setup section of your Ride Aligned setup guide.
The recommended spring rate for your Shock Setup is based on your height, weight, frame size and Ride Modifier settings. In many cases the recommended rate will differ from the rate of the stock spring installed on your bike. In these cases, the stock spring will need to be swapped for a spring that matches the Ride Aligned recommended rate as closely as possible. Your local Norco dealer can help you find and install the correct spring for your weight.
2024 and newer Norco models with coil shocks will also include a Sprindex adjustable-rate coil spring. The rate of these springs can be incrementally adjusted to give more precision when adjusting your spring rate. With this spring installed on your bike, the rate can be adjusted by rotating the plastic spring collar to line up with desired rate labelled on the side of the spring.
Setting damper adjustments
Different shock models have different types of damper adjustments but in most cases there are 1-2 rebound adjustments and 1-2 compression adjustments. Check the information icon in your Ride Aligned Fork Setup for a diagram that shows where to find the adjusters on your specific shock.
Damper settings are typically counted in "clicks". "Clicks" are counted from the adjuster's fully clockwise (closed) position. When setting a damping adjuster start by turning the adjuster fully clockwise. Then turn the adjuster counter-clockwise counting the number of "clicks" until you reach the setting recommended in Ride Aligned. Repeat this process for all shock damper adjustments listed in your Ride Aligned Shock Setup.

Ride Aligned Sliders
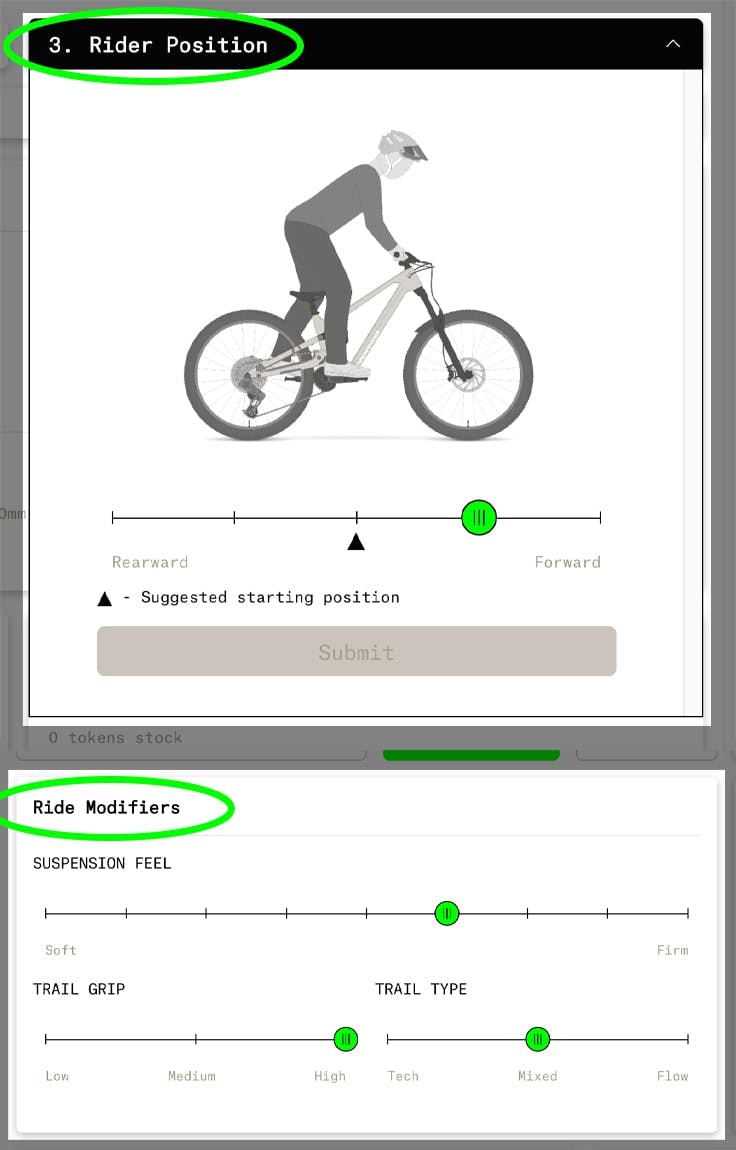
Rider Position
The Rider Position slider adjusts fork and shock settings based on how your weight is distributed between the front and rear wheels. A balanced setup means the front and rear suspension move equally throughout their travel and allow you to maintain a body position that keeps you in control of the bike.
If you're not sure where to set the Rider Position slider, use the recommended starting position. The recommended starting position is based on your height, weight, and frame size. You can use the Setup Assistant feature to guide you through adjusting your position after your first few rides.
Ride Modifiers
Suspension Feel
The Suspension Feel slider adjusts how soft or firm the suspension is. Moving the slider towards "Firm" will increase the fork pressure and the shock pressure or spring rate. Moving the slider towards "Soft" will decrease fork pressure and shock pressure or spring rate. A good setup feels responsive while also being comfortable to ride.
If you're not sure where to set the Suspension Feel slider, start in the middle, and use the Setup Assistant to guide you through making adjustments after your first few rides.
Trail Grip
The Trail Grip slider allows you to adjust your bike setup to different trail conditions. This slider can affect different adjustments on your bike depending on the component spec.
Moving the slider to the "Low" setting will lower recommended tire pressures and can reduce compression damping in the fork and shock to keep you in control when the trails get loose or slippery. Moving the slider to the "High" setting increases tire pressure and can increase compression damping in the fork and shock to add support for those hero dirt days with endless traction.
If you're not sure where to set the Trail Grip slider at first, the default "Medium" is a great all-around starting point. From there, use the Trail Grip slider to adjust your setup for whatever the trail conditions call for
Trail Type
The Trail Grip slider allows you to adjust your bike setup to different trail conditions. This slider can affect different adjustments on your bike depending on the component spec.
Moving the slider to the "Low" setting will lower recommended tire pressures and can reduce compression damping in the fork and shock to keep you in control when the trails get loose or slippery. Moving the slider to the "High" setting increases tire pressure and can increase compression damping in the fork and shock to add support for those hero dirt days with endless traction.
If you're not sure where to set the Trail Grip slider at first, the default "Medium" is a great all-around starting point. From there, use the Trail Grip slider to adjust your setup for whatever the trail conditions call for